环境配置
硬件环境:CPU Ryzen 1600X;显卡:GTX 1050Ti
软件环境:Windows 10 64位、Visual Studio 2015、CUDA 11.3 、cuDNN v8.2.0 、 OpenCV 3.4
Darknet 地址:https://github.com/AlexeyAB/darknet
安装 CUDA
安装 CUDA 前请先安装好 VS 2015;安装 CUDA 时会设置临时解压目录,保持默认即可,第二次才会设置安装目录,临时解压目录和安装目录不能设置为一样的,否则找不到安装。
- 设置临时目录
- 选择自定义,取消
Visual Stiudio Integration;
- 配置环境变量(这步可跳过,安装过程中已配置好环境变量,如果没有自己参考以下添加)。
- 使用
win + R测试,输入命令查看nvcc -V:C:\Users\lanweihong>nvcc -V nvcc: NVIDIA (R) Cuda compiler driver Copyright (c) 2005-2021 NVIDIA Corporation Built on Mon_May__3_19:41:42_Pacific_Daylight_Time_2021 Cuda compilation tools, release 11.3, V11.3.109 Build cuda_11.3.r11.3/compiler.29920130_0
说明安装成功。
安装 cuDNN
- 下载 cuddn,链接:https://developer.nvidia.com/rdp/cudnn-archive ,下载对应 CUDA 版本:
- 下载完成后解压压缩包,将文件夹下的全部文件拷贝至 cuda 的安装目录下;
至此,安装完成。
安装 OpenCV
下载地址:https://opencv.org/releases/
- 下载完成后直接安装,配置环境变量,添加系统变量,变量名为 “OPENCV_DIR”,值为安装目录,我这里是
D:\Downloads\opencv\build;
- 在系统变量
Path后添加 OpenVC 的bin目录;
编译 darknet
- 使用 Git 下载:
git clone https://github.com/AlexeyAB/darknet.git或直接下载源码压缩包,下载完成后解压,目录结构如下;
- 进入
build\\darknet目录,使用 VS 2015 或其他编辑器打开文件darknet.vcxproj,将 CUDA 版本修改为自己 CUDA 的版本号:
还有一处:<ImportGroup Label="ExtensionSettings"> <Import Project="$(VCTargetsPath)\BuildCustomizations\CUDA 11.3.props" /> </ImportGroup><ImportGroup Label="ExtensionTargets"> <Import Project="$(VCTargetsPath)\BuildCustomizations\CUDA 11.3.targets" /> </ImportGroup>
这里需要注意:要确保 C:\Program Files (x86)\MSBuild\Microsoft.Cpp\v4.0\V140\BuildCustomizations 目录下有这几个文件:
如果没有,则需要把 CUDA 安装路径下的 extras\visual_studio_integration\MSBuildExtensions 目录下这四个文件拷贝到上述目录中。
但我的 extras 目录下没有 visual_studio_integration 这个文件夹,我们需要再次打开 CUDA 安装程序,勾选之前没有安装的 visual_studio_integration。
重新安装完成后,在 CUDA 安装目录下的 extras 文件夹能看到 visual_studio_integration 文件夹了,拷贝这四个文件至 C:\Program Files (x86)\MSBuild\Microsoft.Cpp\v4.0\V140\BuildCustomizations 目录中。
使用 VS2015 打开源码目录下的
build\darknet\darknet.sln,我们需要在 VS 2015 中配置 OpenCV;配置包含目录
在 VS 2015 中,右键项目名称,选择 “属性”,在弹出的 darknet 属性页窗口中选择 VC++ 目录,展开 “包含目录”,单击 “编辑”;
注意:在 darknet 属性页窗口中,确保选择的配置的为 Release,平台为 x64,因为后面我们是基于这个配置和平台编译的。
在”包含目录” 窗口中添加 open cv 的路径:
“包含目录”:
- OpenCV安装目录下的
build\include目录; - OpenCV安装目录下的
build\include\opencv目录 - OpenCV安装目录下的
build\include\opencv2目录
- 配置库目录
同样的,在 darknet 属性页窗口,选择 VC++ 目录,展开 “库目录”,单击 “编辑”;
输入 OpenCV 安装目录下的 build\x64\vc14\lib 目录:
- 配置连接器
同样的,在 darknet 属性页窗口,选择 “链接器” - “输入”,在”附加依赖性”中单击”编辑”;
添加 OpenCV 安装目录下的库,如 opencv_world340.lib:
至此,VS 2015 配置 OpenCV 工作完成,接下来要编译 darknet 了。
- 在 VS 2015 工具栏中,找到以下属性并配置,选择
Release,平台选x64,
- 在 VS 2015 菜单栏中,单击”生成”,选择”生成解决方案”进行编译。
测试
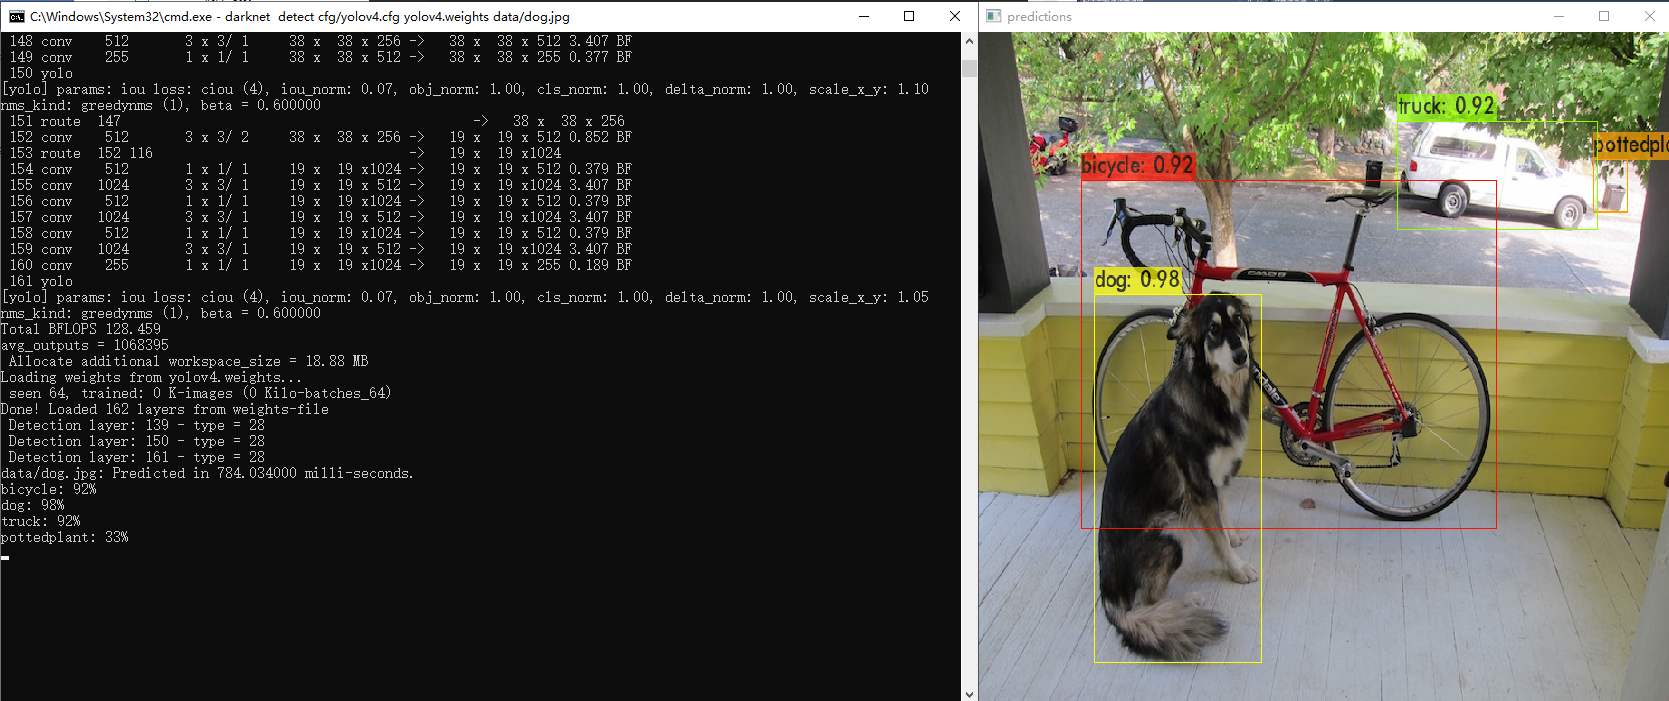
下载 yolov4.weights (yolov4.weights需要fq才能下载,我已放到网盘中。链接:https://pan.baidu.com/s/1ReOIioBBQUmWZSLOFsF5Lw
提取码:2l7u),并将 yolov4.weights 放到和 darknet.exe 同等目录下,使用以下命令测试:
darknet.exe detector test cfg/coco.data cfg/yolov4.cfg yolov4.weights -ext_output data/dog.jpg我又去百度找了张图来测试:
至此,darknet 编译完成,接下来准备搭建视频检测平台了。当然,这是后续了。
Darknet 常用命令
图片检测和识别
darknet.exe detector test cfg/coco.data cfg/yolov4.cfg yolov4.weights -ext_output data/dog.jpg
# 或者
darknet.exe detector test cfg/coco.data cfg/yolov4.cfg yolov4.weights data/dog.jpg
视频检测和识别
darknet.exe detector demo cfg/coco.data cfg/yolov4.cfg yolov4.weights -ext_output test.mp4
# 保存视频
darknet.exe detector demo cfg/coco.data cfg/yolov4.cfg yolov4.weights -ext_output test.mp4 -out_filename res.mp4
# 网络摄像头
darknet.exe detector demo cfg/coco.data cfg/yolov4.cfg yolov4.weights -c 0
darknet.exe detector demo cfg/coco.data cfg/yolov4.cfg yolov4.weights http://192.168.0.80:8080/video?dummy=param.mjpg更多的命令可查看官方介绍:https://github.com/AlexeyAB/darknet#how-to-use-on-the-command-line
错误
1. MSB3721
在使用 VS 2015 编译 darknet 时,就报了 MSB 3721 错误,为解决此错误我还找了很多资料,为此我写了另一篇文章 解决:Darknet编译时报MSB3721错误 来描述,有需要的可去查看。


